In diesem Kapitel erfahren Sie, welche Einstellungsmöglichkeiten Sie in der Configuration Bar der Image Source haben.
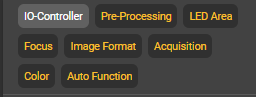
1. Überblick
In der Configuration Bar können Sie alle möglichen Einstellungen für Ihr Bild vornehmen. Sie können diese Einstellungen unabhängig von der Aktivität Ihres Streams jederzeit ändern. Um eine bessere Übersicht über die Einstellungsmöglichkeiten zu haben, können Sie die einzelnen Unterpunkte jederzeit ein- und ausblenden.
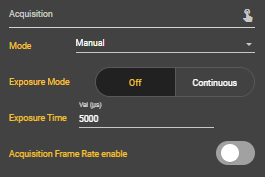
2. Acquisition
Mode
In den Bildaufnahme-Einstellungen können Sie zwischen den vier verschiedenen Aufnahme-Modi wählen: Manual, Free Run, Hardware und Remote. Zusätzlich dazu können Einstellungen zum Belichtungsmodus, zur Belichtungszeit und zur Frame Rate gemacht werden. Je nach Modus gibt es weitere Einstellungsmöglichkeiten.
Modus 1: Manual
Standardmäßig ist der Manual-Modus eingestellt. In diesem Modus können Sie über den gelben Button in der Image Source Control Bar manuell ein Bild aufnehmen.
Exposure Mode
Für den Belichtungsmodus können Sie entweder continuous oder Off wählen. Wenn Sie den Belichtungsmodus auf continuous stellen, passt die Kamera die Belichtung permanent an die äußeren Umstände an. Wenn Sie ihn auf Off stellen, können Sie die Belichtungszeit manuell einstellen.
Exposure Time
Wenn der Belichtungsmodus auf Off gestellt ist, können Sie eine Belichtungszeit zwischen 68 und 2300000 Mikrosekunden wählen. Dadurch bestimmen Sie, wie lange die Kamera während der Aufnahme des Bildes Licht auf den Sensor lässt. Je länger die Belichtungszeit, desto mehr Licht und desto heller wird am Ende das Bild. Wenn bei der ersten Aufnahme ein schwarzes Bild zu sehen ist, liegt das häufig daran, dass die Belichtungszeit zu gering eingestellt ist.
Acqusition Frame Rate enable
Hier können Sie sich entscheiden, ob Sie die Acquisition Frame Rate, also die Bildaufnahme-Rate, aktivieren wollen oder nicht.
Acqusition Frame Rate
Wenn Sie die Acquisition Frame Rate aktiviert haben, können Sie hier einen Wert zwischen 2 und 255.9 wählen. Dieser Wert bezieht sich auf die Bilder pro Sekunde, die aufgenommen werden.
Modus 2: Free Run
Ihre Bilder werden beim Free Run-Modus kontinuierlich aufgenommen. Sie haben hier die gleichen Einstellungsmöglichkeiten wie beim Manual Modus und eine weitere.
Frame Rate
Sie können auswählen, wie viele Bilder pro Sekunde aufgenommen werden sollen. Wählen Sie einen Wert zwischen 1 und 30 fps. Eine hohe Framerate kann negative Auswirkungen auf die Leistung der Kamera haben.
Modus 3: Hardware
Beim Hardware-Modus löst ein Hardware Trigger über den Trigger Pin Ihres Docker-Anschlusses der Smart Kamera die Aufnahme aus. Zu den bereits bekannten Einstellungen vom Manual Modus kommen drei weitere hinzu.
Delay
Bei Delay können Sie einen Wert zwischen 0 und 5000 Millisekunden einstellen. Je nach Eingabewert verzögert sich die Bildaufnahme nach dem Trigger.
Bouncing Time
Bei der Bouncing Time können Sie einen Wert zwischen 0 und 1000 wählen. Das ist die Zeit, die nach einem Trigger abgewartet wird, bis erneut auf einen Trigger reagiert wird. So kann vermieden werden, dass zwischendurch mehrere Aufnahmen durch fehlerhafte Trigger gemacht werden.
Edge
Hier können Sie einstellen, ob das Bild aufgenommen werden soll, sobald der Trigger ausgelöst wird (rising) oder sobald der Trigger nicht mehr wahrzunehmen ist (falling).
Modus 4: Remote
Mit dem Remote-Modus können Sie die Bilder auch manuell aufnehmen, allerdings nicht über die Weboberfläche, sondern über die http-Rest Schnittstelle. Die Einstellungsmöglichkeiten sind die gleichen wie beim Manual Modus.
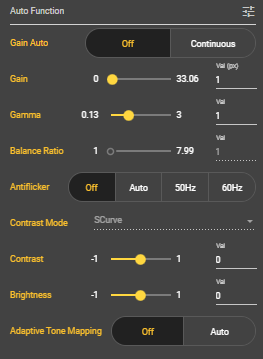
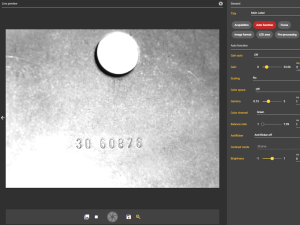
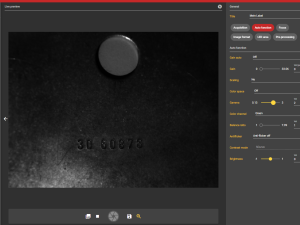
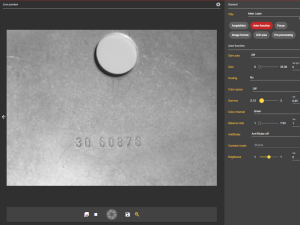
3. Auto Function
Unter dem Unterpunkt Auto Function können Sie verschiedene Einstellungen vornehmen, die vom Bildsensor bereits bei der Aufnahme beachtet werden.
Gain Auto
Hier kann das Gain automatisch angepasst werden, um eine bestimmte Helligkeit zu erzielen. Mit der Gain Funktion verstärken Sie das Sensorsignal und können somit Ihr Bild erhellen. Möchten Sie Gain manuell einstellen, wählen Sie Off. Es erscheint der Gain Parameter. Wenn Sie Gain Auto auf continuous stellen, passt sich der Gain-Wert den äußeren Begebenheiten an.
Gain
Geben Sie einen Wert zwischen 0 und 33.06 ein, um Ihr Bild heller zu machen. Alle Pixelwerte auf dem Bild werden bei Erhöhung des Gains verstärkt.
Gain-Wert 0
Gain-Wert 7
Gamma
Mit diesem Parameter können Sie den Gammawert anpassen. Die Werte können sich von 0.13 bis 3 erstrecken. Dadurch können Sie die Bildhelligkeit zur Darstellung auf einem Monitor optimieren.
Gamma-Wert 2
Gamma-Wert 0,45
Balance Ratio
Mit dieser Einstellung können Sie manuell eine Farbverschiebung für den Weißabgleich vornehmen. Weiße Objekte sollen weiß erscheinen.
Antiflicker
Mit der Antiflicker-Einstellung können Sie gegen Streifenbildung vorgehen, die aufgrund der Beleuchtung entstehen könnte. Die unterschiedlichen Einstellungsmöglichkeiten bestimmen die Frequenz.
Contrast Mode
Bei diesem Parameter ist standardmäßig die sogenannte S-Kurve ausgewählt. So wird der Kontrast Ihres Bildes erhöht. Bei der S-Kurve werden helle Töne weiter aufgehellt und dunklere weiter abgedunkelt, um ein kontrastreiches Bild zu erhalten.
Contrast
Hier können Sie den Kontrast Ihres Bildes einstellen. Wenn Sie einen negativen Wert wählen, wird das Bild dunkler. Wenn Sie einen positiven Wert wählen, heller.
Brightness
Hier können Sie die Helligkeit einstellen. Wenn Sie einen negativen Wert wählen, wird das Bild dunkler. Wenn Sie einen positiven Wert wählen, heller.
Adaptive Tone Mapping
Hier können Sie das Adaptive Tone Mapping des Bildsensors an- oder ausschalten. Ziel von Tone Mapping ist, den Kontrastumfang von Bildern zu reduzieren, sodass sie auf herkömmlichen Ausgabegeräten angezeigt werden können.
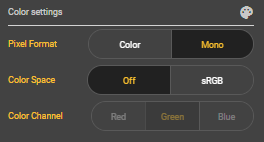
3. Color
Unter dem Unterpunkt Color können Sie verschiedene Einstellungen zu den Farbeinstellungen Ihres Bildes vornehmen.
Pixel Format
Hier können Sie Color oder Mono als Pixel Format wählen. Das Pixel Format bestimmt, wie die einzelnen Pixel aufgebaut sind und wie die Bilddaten dargestellt werden.
Color Space
Hier können Sie entscheiden, ob sie einen sRGB-Farbraum möchten oder nicht. sRGB steht für Standard-RGB und ist der typische Farbraum für Grafiken im Web. Es ist sinnvoll, den sRGB Farbraum zu wählen, wenn die Bildhelligkeit zur Darstellung auf einem Monitor optimiert werden soll.
Color Channel
Hier können Sie einstellen, welcher der Farbkanäle Rot, Grün oder Blau angezeigt werden soll.
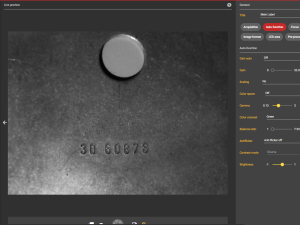
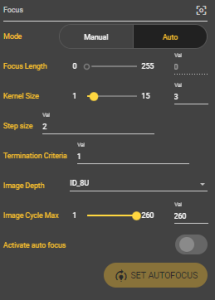
4. Focus
Unter diesem Punkt können Sie den Fokus manuell oder automatisch einstellen. Wenn Sie den Fokus manuell einstellen möchten, wählen Sie einen Wert zwischen 0 und 255. Dieser Parameter ist nur relevant, wenn eine Flüssiglinse in Ihrer evoVIU verbaut ist. Dann können Sie hier Ihr Objekt scharf stellen.
Focus Length
Wählen Sie hier einen Wert zwischen 0 und 255, um den Fokus einzustellen und somit Ihr Bild scharf zu stellen.
Autofocus
Kernel Size
Eine größere Kernel-Größe kann eine genauere Verarbeitung des Bildes ermöglichen und somit eine bessere Fokussierung des Objekts ermöglichen. Eine zu große Kernel-Größe kann jedoch auch zu unerwünschten Artefakten oder einem erhöhten Rauschen im Bild führen, was wiederum zu einer schlechteren Fokussierung führen kann. Es ist wichtig, die geeignete Kernel-Größe für den Autofokus je nach Anwendung und den Anforderungen der Kamera zu wählen.
Step Size
Die Step Size ist ein wichtiger Parameter, der bestimmt, wie genau ein Algorithmus ein Bild verarbeitet. Eine zu große Step Size kann dazu führen, dass der Autofokus das Objekt nicht genau genug erfasst, da er nicht genug Informationen über die gesamte Oberfläche des Objekts sammelt. Eine zu kleine Step Size kann hingegen dazu führen, dass der Autofokus zu viel Zeit benötigt, um das Objekt zu fokussieren, was wiederum zu einer schlechteren Leistung führen kann.
Termination Criteria
Termination Criteria geben an, wann ein Algorithmus beendet werden soll, basierend auf bestimmten Bedingungen, die während der Verarbeitung erfüllt werden müssen. In Bezug auf den Autofokus können Termination Criteria verwendet werden, um sicherzustellen, dass der Autofokus auf das Objekt scharf stellt, bevor er den Fokussierungsprozess beendet.
Image Depth
Image Depth bezieht sich auf die Anzahl der Farbkanäle, die in einem Bild vorhanden sind. Die Image Depth kann sich auf die Genauigkeit des Autofokus auswirken, da der Autofokus aufgrund von Unterschieden in der Farbtiefe möglicherweise Schwierigkeiten hat, das Objekt scharf zu stellen.
Image Cycle Max
Image Cycle Max bezieht sich auf die maximale Anzahl von Bildern, die in einem bestimmten Zeitraum aufgenommen und verarbeitet werden können. Die Image Cycle Max kann ein wichtiger Faktor sein, da der Autofokus in Echtzeit arbeiten muss, um die Schärfe des Objekts kontinuierlich zu überwachen und anzupassen. Eine niedrige Image Cycle Max kann dazu führen, dass der Autofokus nicht schnell genug auf Veränderungen im Bild reagieren kann, was zu unscharfen Bildern führen kann.
Activate auto focus
Hier können Sie den Autofokus aktivieren und deaktivieren.
Mit Klick auf diesen Button starten Sie den Autofokus. Ab hier übernimmt die Kamera die Arbeit für Sie.
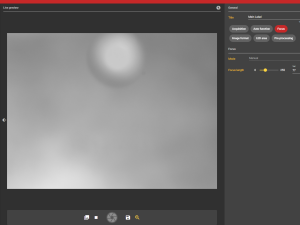
Brennweite 77
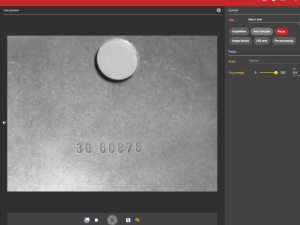
Brennweite 217
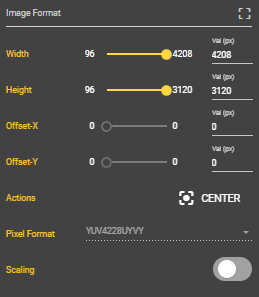
5. Image Format
Unter dem Punkt Bildformat können Sie die Anzahl der Pixel und dementsprechend die Auflösung Ihres Bildes einstellen. Sie können sowohl Ihre gewünschte Weite als auch die Breite, den X-Versatz und den Y-Versatz einstellen. Die Wahl des Bildformats hat auch einen Einfluss auf die Leistung der Weboberfläche.
Width
Hier stellen Sie die Breite Ihres Bildes ein.
Height
Hier stellen Sie die Höhe Ihres Bildes ein.
Offset-X
Hier können Sie Ihr Bild auf der X-Achse bewegen, um den gewünschten Bildausschnitt zu erhalten.
Offset-Y
Hier können Sie Ihr Bild auf der Y-Achse bewegen, um den gewünschten Bildausschnitt zu erhalten.
Actions
Mit Klick auf Center können Sie alle obigen Einstellungen zentrieren.
Pixel Format
Hier sehen Sie, mit welchem Pixelformat Ausgabepixel formatiert werden. Das Pixel Format bestimmt, wie die einzelnen Pixel aufgebaut sind und wie die Bilddaten dargestellt werden.
Scaling
Mit dem Scaling Parameter können Sie Bilder von der Sensorgröße auf Ihre Bild-ROI skalieren.
Sharpness Enhancement
Haben Sie Ihr Bild mit dem Scaling Parameter bearbeitet, können Sie mit dem Sharpness Enhancement die Schärfe erhöhen. Dazu können Sie einen Wert zwischen 0 und 1 wählen. Je höher der Wert, desto schärfer wird das Bild.
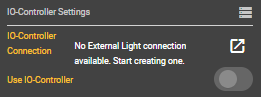
6. IO-Controller
Unter diesem Menüpunkt können Sie Ihren IO-Controller für die Verwendung von externem Licht einstellen.
IO-Controller Connection
Hier können Sie Ihre IO-Controller Connection wählen. Diese müssen Sie vorher unter dem Menüpunkt Connections konfigurieren.
Use IO-Controller
Wählen Sie hier aus, ob der IO-Controller verwendet werden soll oder nicht.
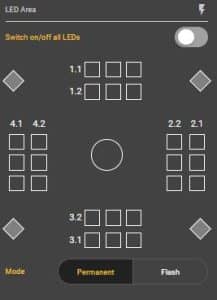
7. LED Area
Unter dem Menüpunkt LED Area können Sie das Licht Ihrer evoVIU steuern. Je nachdem, welches Lichtmodul Sie verbaut haben, kann die Darstellung anders aussehen. Die dargestellten Kästchen entsprechen dabei den einzelnen LEDs.
Wenn Sie diese Einstellung anwählen und den Dialog bestätigen, werden alle LEDs gleichzeitig angeschaltet. Die Intensität ist dann auch für alle LEDs gleich.
Falls Sie die LEDs einzeln anwählen möchten, können Sie einfach auf eines der Kästchen klicken und es öffnet sich das jeweilige Segment. Hier können Sie nun rechts oben anwählen, welche LED Sie anschalten möchten. Nach dem Klick färben sich diese gelb.
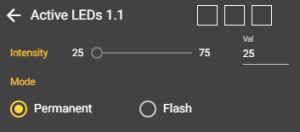
Intensity
Stellen Sie hier die Intensität der Lichter ein. Je höher der Wert, desto heller leuchten die LEDs.
Mode
Wählen Sie, ob die LEDs permanent leuchten oder aufblinken sollen.
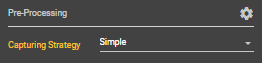
8. Pre-Processing
Unter diesem Menüpunkt können Voreinstellungen für die Bildverarbeitung vorgenommen werden.
Capturing Stategy
Wählen Sie hier, wie Ihr Bild aufgenommen werden soll. Sie haben die Wahl zwischen Simple, Image Fusion und Double Shot.
Simple: Das Bild wird je nach gewählten Aufnahmemodus aufgenommen.
Double Shot: Zwei Bilder werden von zwei verschiedenen Seiten aufgenommen und miteinander fusioniert.
Image Fusion: Es werden vier Bilder von den vier Seiten aufgenommen und miteinander fusioniert, so dass daraus ein Tiefenbild entsteht.