evoVIU Dokumentation
-
Einleitung
-
Allgemeines & Sicherheit
-
Hardware
-
Software
-
- Articles coming soon
In diesem Kapitel erfahren Sie, wozu Sie die Image Source Stream Area benötigen und was die Icons in der Control Bar bedeuten.
1. Überblick
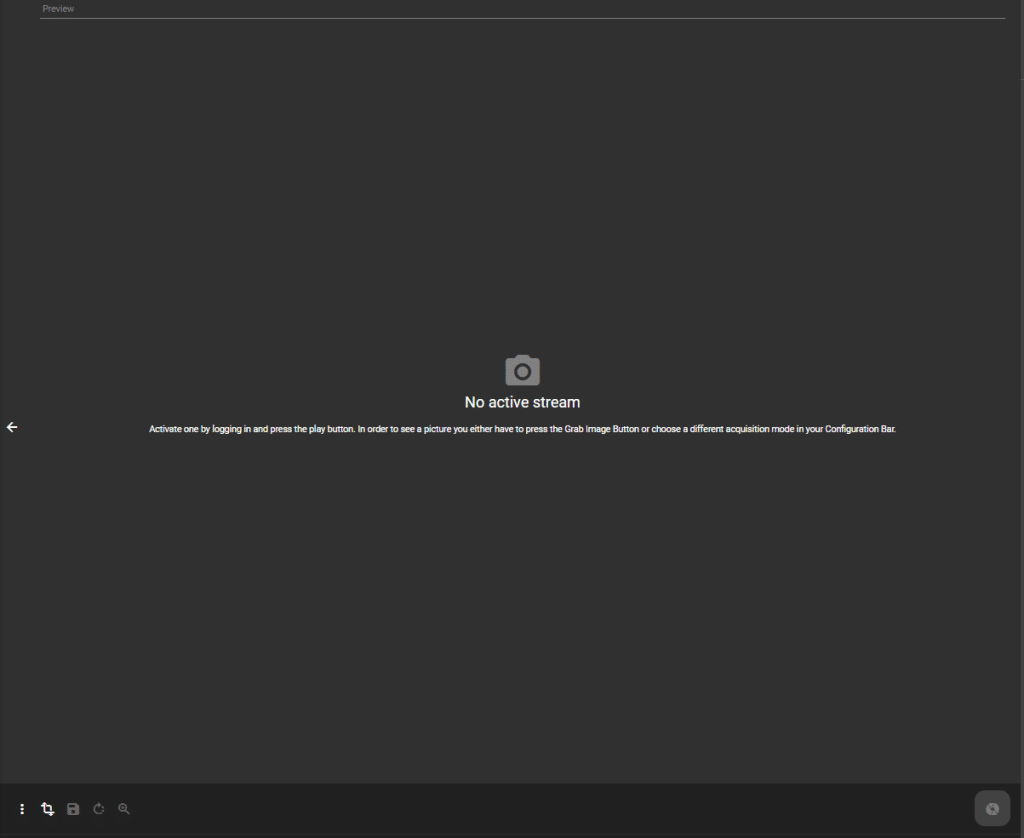
Die Image Source Stream Area besteht aus dem Bild-Stream und der Image Stream Control Bar. Wo aktuell noch “No active stream” steht, wird bald Ihr Bild zu sehen sein.
2. Aktivieren des Streams
Im Menü Punkt Image Source ändert sich auch der Header der Anwendung. Es erscheint der Play Button und das Link-Icon. Mit dem Play Button können Sie den Stream starten. Nur wenn der Stream gestartet wird, können Sie Bilder aufnehmen. Das Link-Icon zeigt, ob die ausgewählte Image Source auch in anderen Bereichen der Webanwendung verwendet wird. Ist dies der Fall, kann die Image Source nicht gelöscht werden.
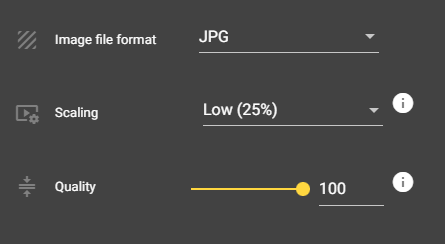
Über das Icon in der Mitte können Sie wählen, welches Dateiformat Ihr Bild haben soll. Außerdem können Sie das Scaling und die Qualität Ihres Bildes einstellen.
3. Stream Control Bar

Mit dem Icon auf der rechten Seite können Sie den Stream starten, falls Sie im Acquisition Mode Manual gewählt haben. Falls Sie Bilder in einem anderen Modus aufnehmen, ist dieser Button ausgegraut.
Mit Klick auf die Lupe färbt sich diese gelb und wird aktiv. Sobald sie gelb ist, können Sie mit dem Mausrad oder Ihren Fingern in das aktuelle Bild hinein oder auch wieder aus dem Bild herauszoomen.
Mit dem Rotate Icon können Sie Ihr Bild nach rechts drehen.
Mit dem Save-Icon können Sie Ihr Bild im Menüpunkt Files speichern. Es wird automatisch eine Directory mit dem Namen der Image Source erstellt.
Über dieses Icon können Sie weitere Transform-Aktionen durchführen.
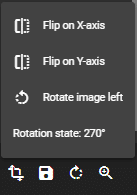
Sie können das Bild spiegeln und auch nach links rotieren lassen. Mit Klick auf den Rotation Status können Sie das Bild in den Ursprungszustand zurücksetzen.
Über das Dreipunkt-Menü ganz links können Sie weitere Aktionen durchführen.
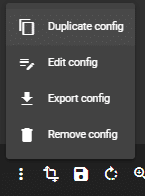
Dazu gehören das Duplizieren, Bearbeiten, Exportieren und Löschen der Image Source.
