evoVIU Dokumentation
-
Hardware
-
-
- Articles coming soon
-
-
-
Software
-
- Articles coming soon
-
- Articles coming soon
-
- Articles coming soon
-
- Articles coming soon
-
- Articles coming soon
-
- Articles coming soon
-
-
Introduction
-
General & Safety
This chapter describes the functions of the display on the smart camera.
1. Introduction
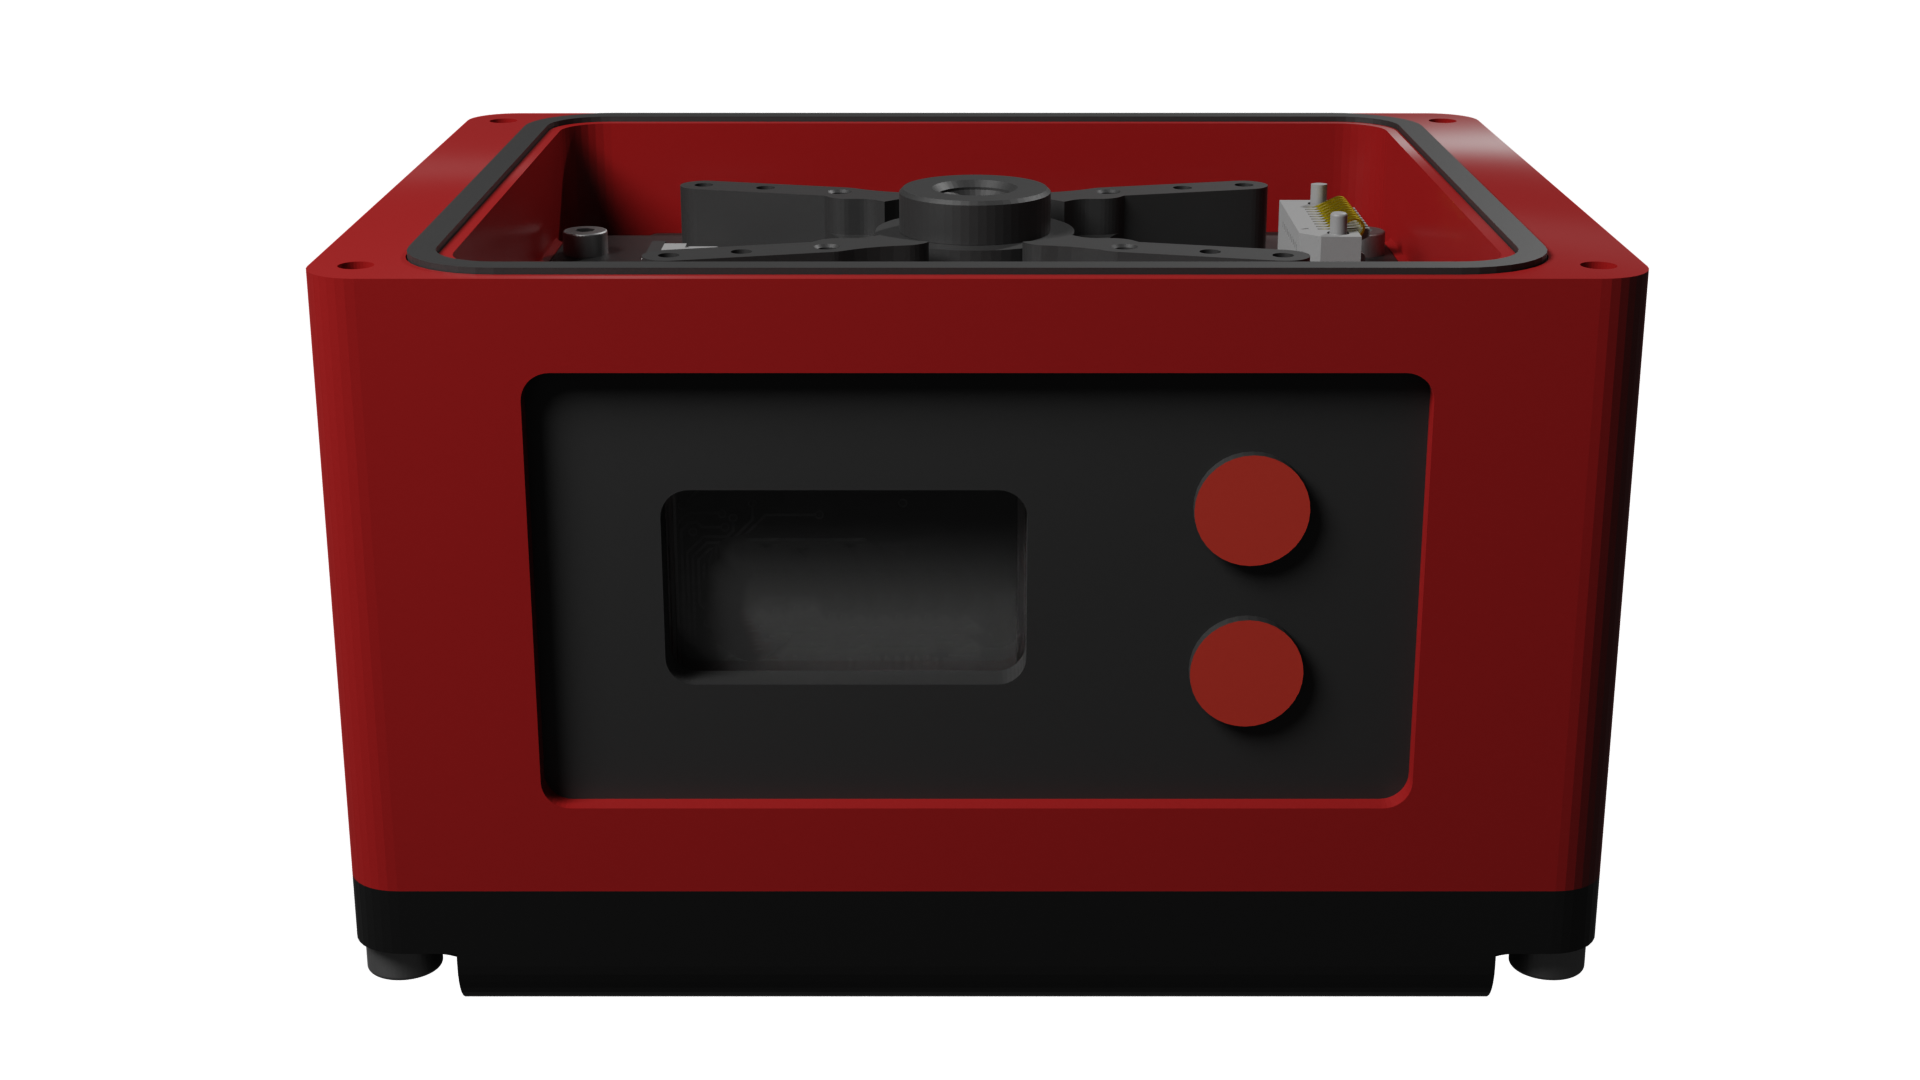
A display is installed on the evoVIU that can control various settings of the camera independently of the application software. A two-button switch is used to guide the user through the individual points.
2. Operation
Enter
The upper button is used to confirm the selection.
In the settings of the different IP addresses, the corresponding digits of the IP can be selected.
Mode / Select
The lower key is used to guide and select the corresponding menu item.
In the settings of the different IP addresses, this button can be used to increment the numbers.
Enter
Mode/Select
Display
3. Functional Overview
Dashboard
The display dashboard shows the most important information of the camera. The status bar (top) and menu (bottom) are explained below:
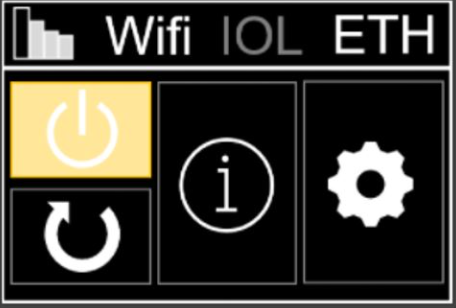
Status Bar
- Radio signal strength: Strength Low (1) to High (4)
- Wireless variant: Wifi/3G/4G/5G
- Docker variant: IOL/EXL/GPO
- Network: ETH

Menu
- Shutdown
The operating system is shut down.
The camera can then be unplugged. - Restart
The camera can be restarted. It is not necessary to remove the mains plug. - System Information
System information such as the name of the access point or the current IP address can be read out. - Adjustment/Setting
Settings for NTP server, IP addresses, gateway, DNS, access point and auto-restart, as well as a camera restore can be made.

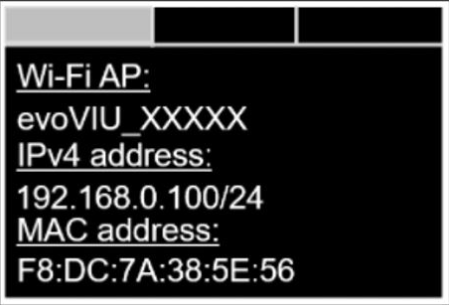
System Information (1)
- Wi-Fi AP:
Name of the access point - IPv4 address:
Currently set IPv4 address - MAC address:
MAC address of the camera
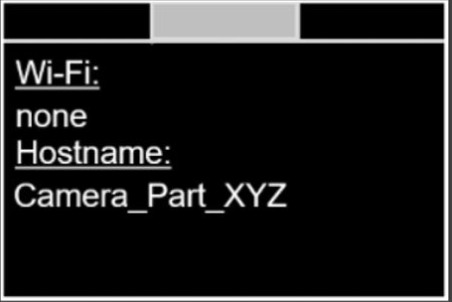
System Information (2)
- Wi-Fi:
Connected SSID of the Wi-Fi access point - Hostname:
Name of the camera in the network
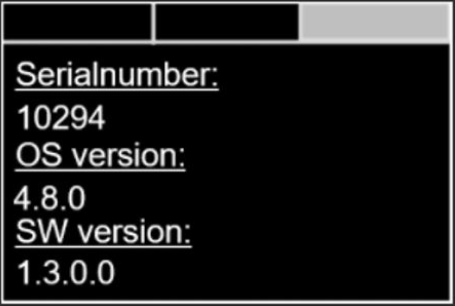
System Information (3)
- Serial number
Camera serial number - Version of the operating system
Current operating system version - Software version
Current software version
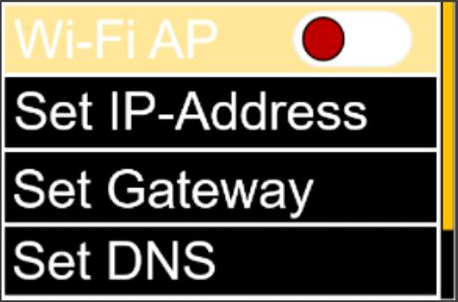
Setting (1)
- Wi-Fi AP (Off / On)
Activation of the access point - Set IP address
Set IP address manually - Set Gateway
Set gateway manually - Set DNS
Set DNS server manually
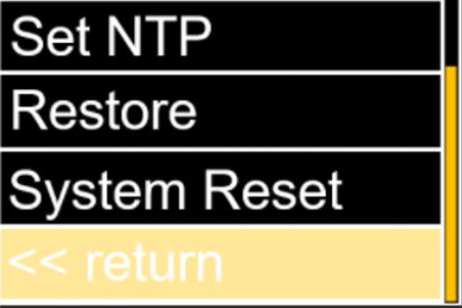
Setting (2)
- Set NTP
NTP – Set server manually - Restore
Resetting the camera contents - System Reset
Reset the camera - Car. Rest.
Switching off the auto-restart, so that the last running routine is not restarted on restarting - Return
Return to the main menu